[Tutorial] Set up Gitea with Nginx.
In this tutorial I’ll go through the steps to set up your own Gitea instance with Nginx. There are probably several different methods to achieve the same goal, this is how I recommend it.
Prerequisites
A server/vps with Ubuntu 16.04 LTS and Nginx already installed. The server should also be set up with a FQDN and be available live. In this tutorial I’ll be using example.com as the FQDN. You also need an user that is in the sudo group and with the possibility to log on to the server or a root user (not recommended to have active on a live server).
First we need to create a new user.
sudo adduser git
Follow the instructions on the screen. When you’ve created the user, become the user with
su - git
Execute the command pwd to ensure you are in the git users home folder /home/git. Now we can download the latest binary version of Gitea from gitea.io with wget
wget -O gitea https://dl.gitea.io/gitea/1.2.0-rc2/gitea-1.2.0-rc2-linux-amd64
And make the file executable with chmod +x gitea.
Now we’ll start Gitea for the first time. You’ll see some log lines on your screen. Amongst them a line looking like this: Listen: http://0.0.0.0:3000. Notice the :3000. That is the port number Gitea listens to.
The next step is to set up Gitea. Open a web browser of your choice and go to your server http://example.com:3000/install Again, notice the extra :3000 after your domain name.
We are now going to set up Gitea. We start from the top with the database settings.
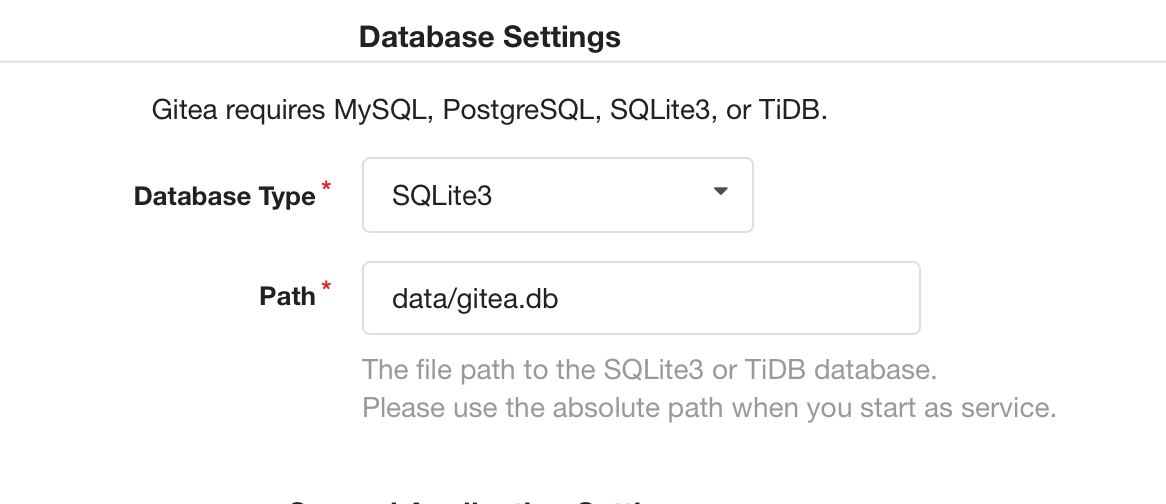
Here we choose SQLite3 as the DB. There are other options, but for personal use, SQLite will do just fine.
The it is time for general application settings.
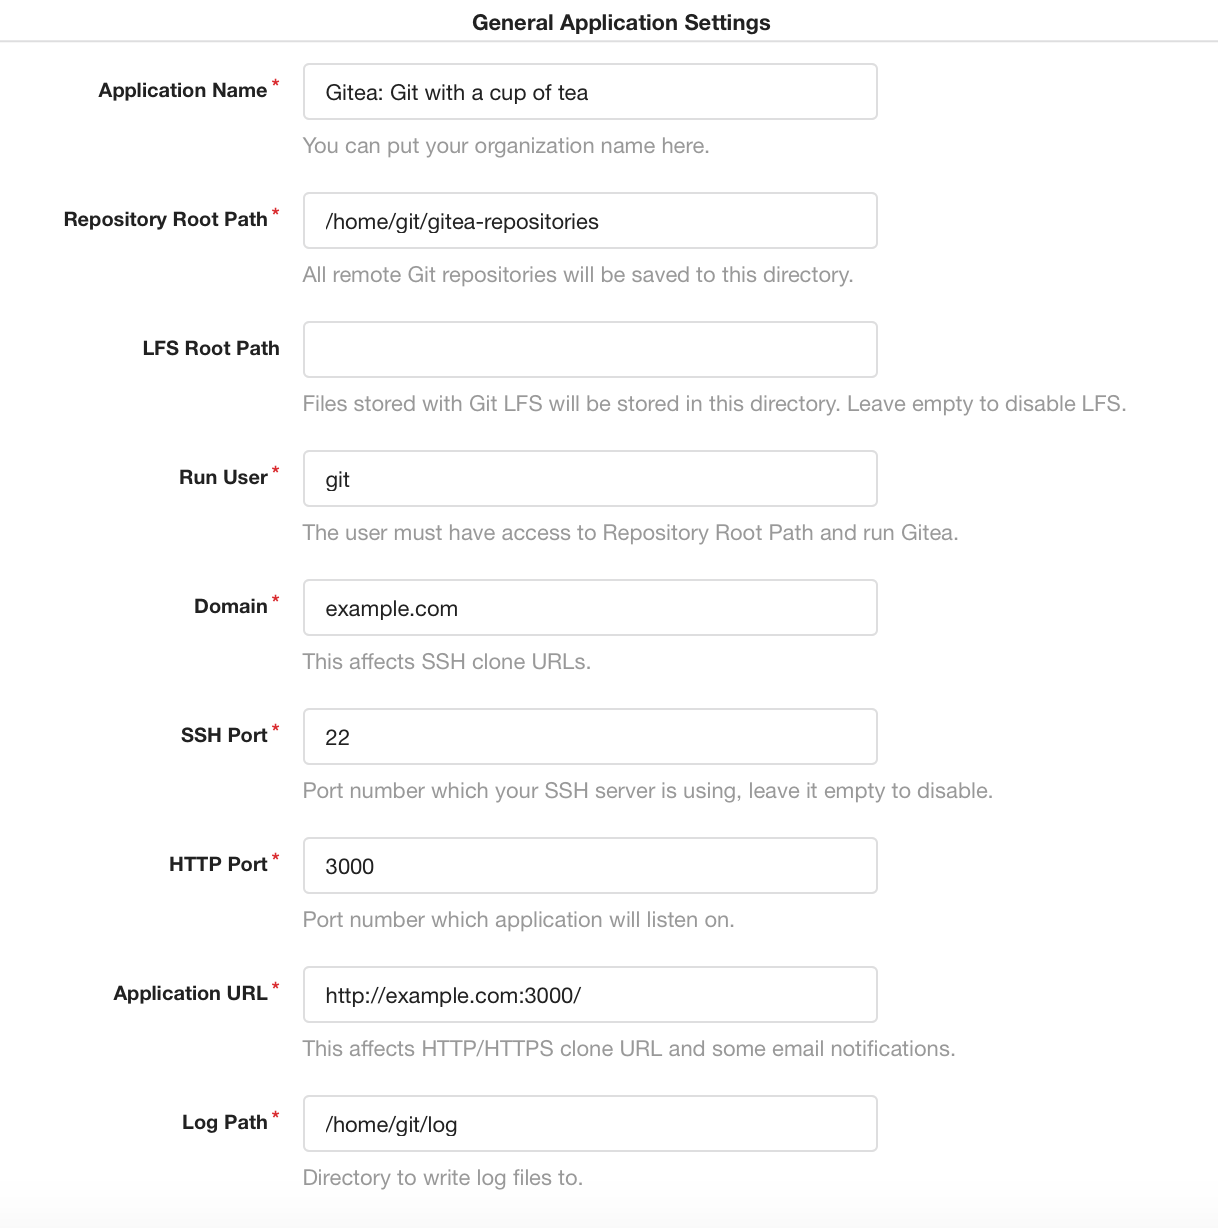
You can use the settings shown in the image (just remember to change example.com to your domain name), or you can change values as you see fit.
After this it is the optional settings. This needs to be completed if you server is going to be open for registration.
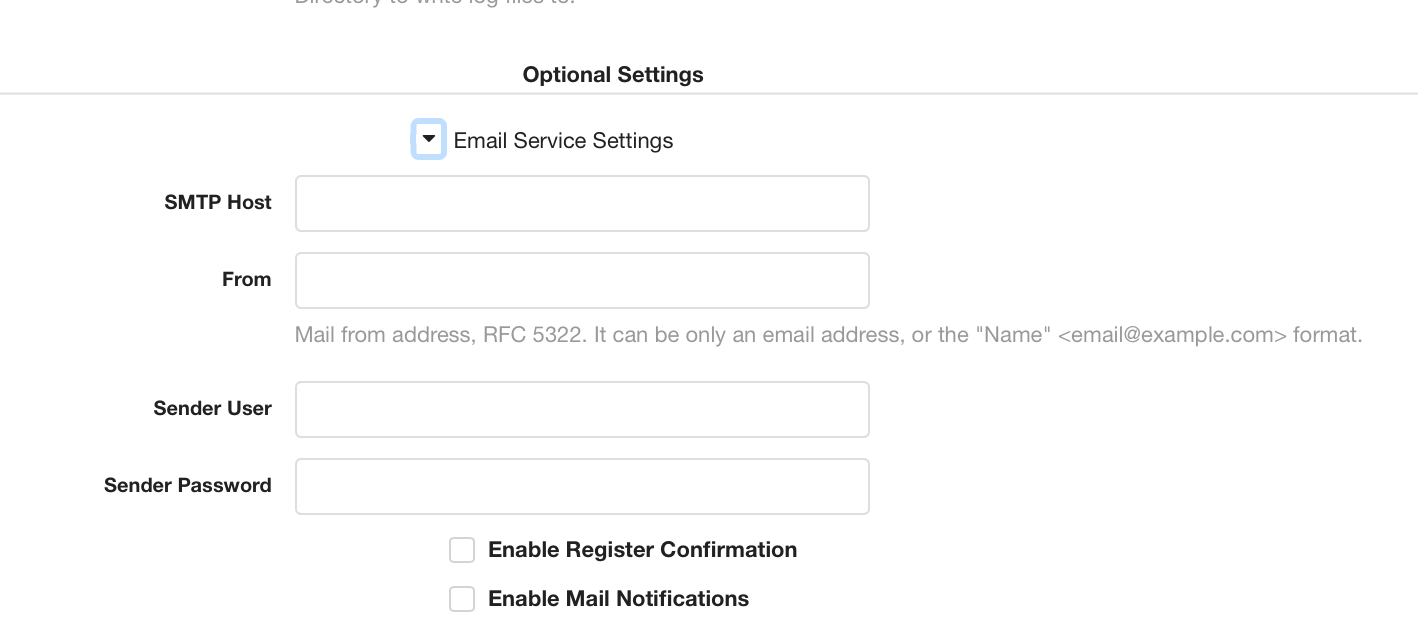
In this tutorial, we will not allow self registration, as is shown in the next section; server settings.
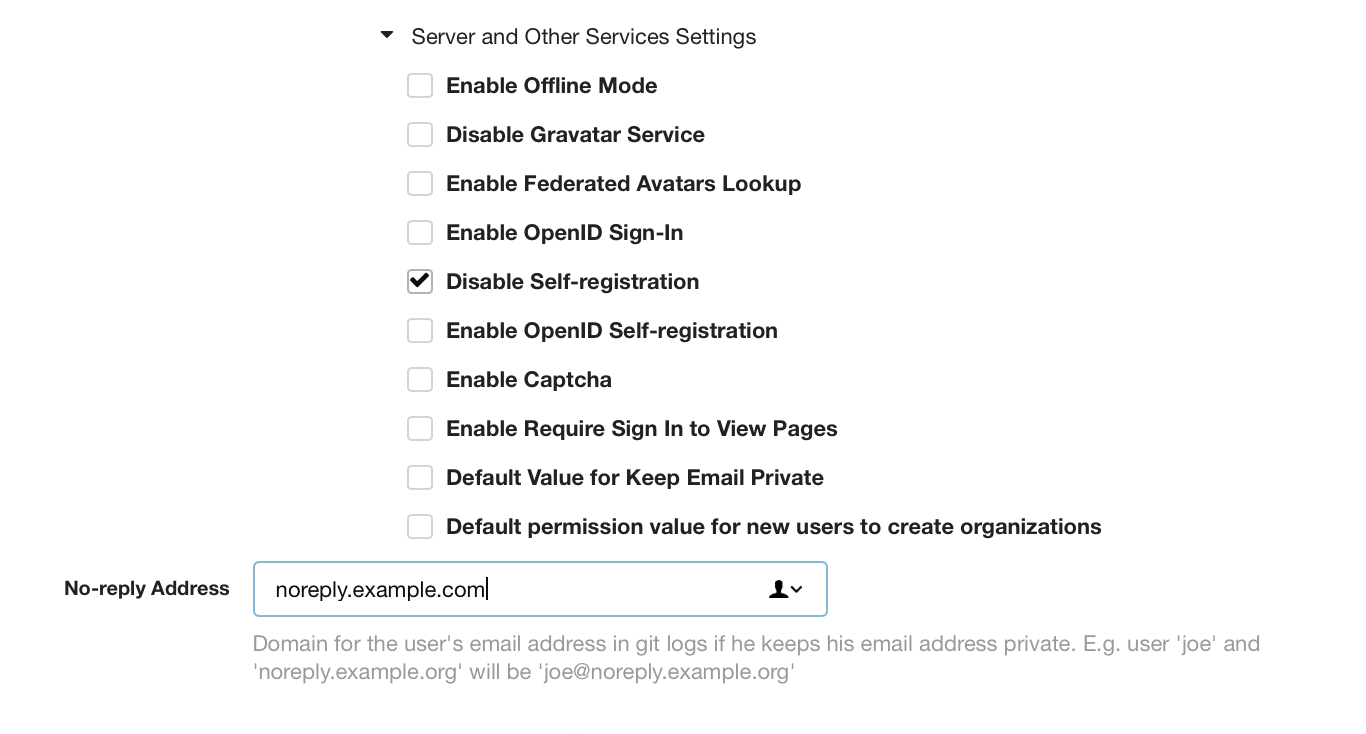
If you use this setup, you can still add users, but users can not add themselves. And finally we add the admin account.
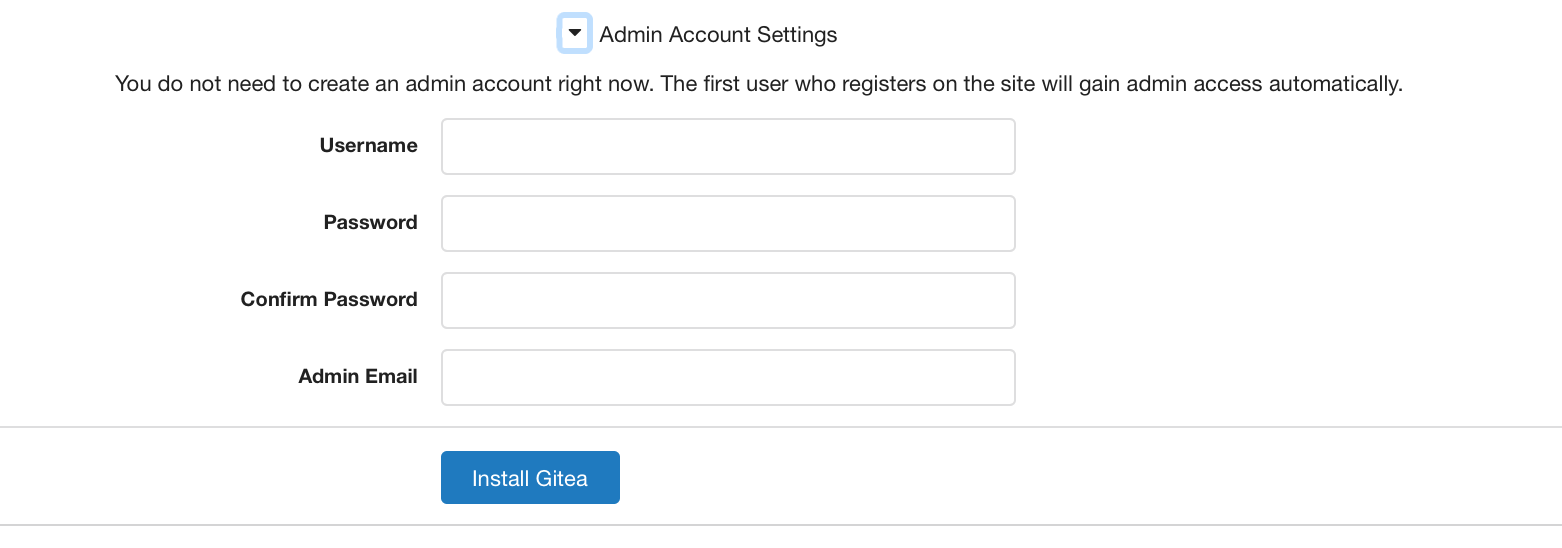
And as always remember to use a good strong password.
When you’ve filled out all the fields and ticked all the correct boxes, you can hit the “Install Gitea” button.
And now you have your very own git server running with Gitea. But as you will notice, there still is a :3000 after your domain name in your browser. So now we will make that disappear with Nginx!
Go back to your terminal and press ctrl+c to stop Gitea.
We will now make a new vhost file for Nginx to use. I’m using nano as the editor, but use the editor you’d like.
sudo nano /etc/nginx/sites-available/example.com.vhost
And copy/paste this text to the file.
server {
listen 80;
server_name example.com;
location / {
proxy_pass http://example.com:3000;
}
}
Again, remember to change example.com to your domain! Save the file and exit your editor. We have now made a vhost file for the domain. Now we need to “activate” it. Make a link for file to the sites-enabled directory.
sudo ln -s /etc/nginx/sites-available/example.com.vhost /etc/nginx/sites-enabled/
Now restart Nginx with sudo service nginx restart, and start Gitea again ./gitea web. You can now use your browser and go to your site without :3000 at the end.
But, if we leave it like this, Gitea will stop when you close your terminal. We need to make a service out of Gitea. So we need to make another file. Stop Gitea again with ctrl+c and start a new file with your editor.
sudo nano /etc/systemd/system/gitea.service
Copy past the following
[Unit]
Description=Gitea
After=syslog.target
After=network.target
[Service]
Type=simple
User=git
Group=git
WorkingDirectory=/home/git/
ExecStart=/home/git/./gitea web
Restart=always
[Install]
WantedBy=multi-user.target
Save the file and exit the editor. Enable the service with
sudo systemctl enable gitea.service
Start Gitea with sudo service gitea start. And after that run sudo service gitea status. After the last command you should see something like this;

You should also be able to go to your site in your browser. Now we’ve set up Gitea with Nginx and reverse proxy. We’ve also made a service for Gitea, so it will start when the server starts.
In a later post, I’ll show how to set up a SSL certificate with Lets Encrypt and your Gitea server.
Any comments or feedback? Comment below!